Performing Printing after Cutting

This method uses printing data including cutting lines to perform cutting first followed by printing. Performing cutting first reduces the drying time compared to cutting after printing. Depending on the model you are using, this setting may be disabled.
  1. Click for the queue folder that you want to use.

    The Queue Properties window appears.
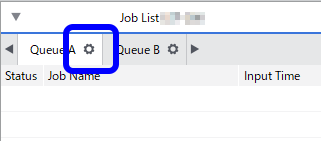
  2. Click .
  3. From the Operation Mode list, select Cut & Print .
    IMPORTANT: When you select Cut & Print , the following settings are disabled.
  4. If necessary, perform the operations shown below.
    • To cut along all lines (paths) drawn in vector format in the data

      • Select the Cut All Paths check box. All paths will be recognized as cutting lines and will be cut regardless of whether they are drawn with the spot color (CutContour).

    • To cut the border of the job regardless of whether a cutting line is present

      • Select the Cut Image Boundaries check box.

    • To pull back the media after printing

      • Select the Return to Origin After Print check box.
    • To return the media to the origin (the position before cutting) after cutting

      • Select the Return to Origin After Cut check box.

    • To specify the number of cut passes
      • Select the Cut Passes check box, and then specify the number of passes.
    • To configure printer cutting conditions such as the blade force

      • Select the Cutting Conditions Settings check box to enable the settings.

    • To feed out media according to the size of the data sent from the computer before starting output, thereby preventing the media from being pulled out with excessive force
      • Select the Execute PREFEED Operation check box. The media is fed out and is then pulled back to the output-start location.
  5. Configure other settings such as the media settings if necessary.
  6. Click OK.
    IMPORTANT:
    • The source data of the job is an EPS file.
    • A cutting line has been drawn around the border.

      If both of the above conditions are met, additional settings are required. If you do not configure these additional settings, it may not be possible to cut a part of the border. Configure the settings shown below.

    1. In the Queue Properties window, click .
    2. Enter the value in Margin under EPS.
      • If you scale the image in the Queue Properties or Job Settings window, the size of the margin will also be scaled.

      • When you add a job to the job list, the margin set with Margin is automatically added within the range specified by the border.

  7. Click .
    The Advanced Print Settings window appears.
  8. Set the Print Count.
  9. Click Print.
    First, the job is cut. When cutting finishes, printing starts automatically. This operation is repeated for the number of times specified with Print Count.
    IMPORTANT:
    • You can also change these settings in the Job Settings window after adding a job to the job list. However, you cannot change the Cut All Paths setting or the Margin setting under EPS.

    • If you want to set Enable Variable Data Printing on the Job Settings screen, select an option other than Cut & Print . When Enable Variable Data Printing is enabled, you cannot select Cut & Print .