Setting the Overlap Width
-
Click
 .
.
-
Select how to create the overlapping from the options in the Type list under Overlap.
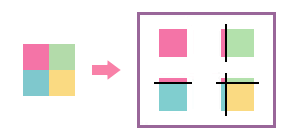
- Top-Left: Creates overlap widths at the top and left of tiles.
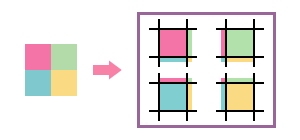
- ALL Corners: Creates overlap widths around each tile.
- Top-Left: Creates overlap widths at the top and left of tiles.
-
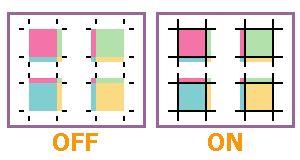
To print overlap lines, select the Print Overlap Lines check box.
IMPORTANT: You can set the thickness and the color of overlap lines.
- Enter a value in Stroke under Overlap.
- Click Color Settings. The Color Settings window appears.
- Select RGB or CMYK from ColorSpace, and then adjust the slider bars or enter the values for each color.
- Click OK.