
Maintaining the Clipped Position
This section explains how to print a clipped image maintained at its original position.
When you are using jigs to align multiple objects on the flat table and print a single image as tiles, it is only possible to reprint a single object.
Procedure
-
In the job list, double-click the job.
The Job Settings window appears.
- Click
 .
. - Select the Clip Image check box.
- Set the part to be printed (the clip area).
- Select the Maintain Clipped Position check box.
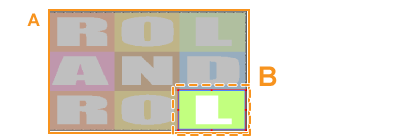
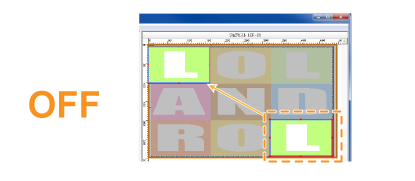
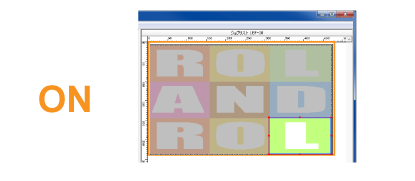
A Source data B Clipped position You can print a clipped image maintained at its original position. If you do not specify this setting, the clipped image will automatically be placed at the origin.
 IMPORTANT Maintain Clipped Position cannot be set in the following situations:
- When tiling has been set
- When there are multiple pages
- When the job is a nested job
- When multiple copies are being printed
IMPORTANT If you have moved the data to a position other than the origin, that position will be used as the reference for clipping. If you have rotated or mirrored the data, the rotation or mirroring will be taken into account when maintaining the position.