
Step 4: Adjusting the Output Colors and Performing Printing
Use Reference Printer Data and Target Printer Data to perform color matching and output data.
-
Click
 for the queue folder that you want to use.
The Queue Properties window appears.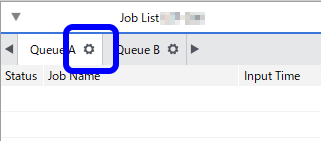
- Click
 .
. - Select the Perform Printer Color Matching check box under Printer Color Match Settings.
If the Reference Printer Data and Target Printer Data are not registered, the Printer Color Match Settings setting area will be unusable and displayed in gray.
- Click Color Settings under Reference Printer Data.
The Reference Printer Data Settings window appears.
- Select the desired data from the Reference Printer Data List, and then click OK.
To check the details of the reference printer data, select the desired data, and then click Review Details. You can check the detailed settings on the Advanced window that appears.
- Click Color Settings under Target Printer Data.
The Target Printer Data Settings window appears.
- Select the desired data from the Target Printer Data List, and then click OK.
To check the details of the target printer data, select the desired data, and then click Review Details. You can check the detailed settings on the Advanced window that appears.
- Click OK.
The Queue Properties window closes.
- Click
 .
.